
How to Build Your DIY Camping First Aid Kit: 7 Essential Tips
Table of Contents
Why Your Store-Bought Kit Might Not Be Enough
Here’s a sobering thought — the American Red Cross reports that nearly 50% of outdoor recreation injuries happen more than an hour away from emergency medical care. That changes everything about how you should think about preparedness before hitting the trail.
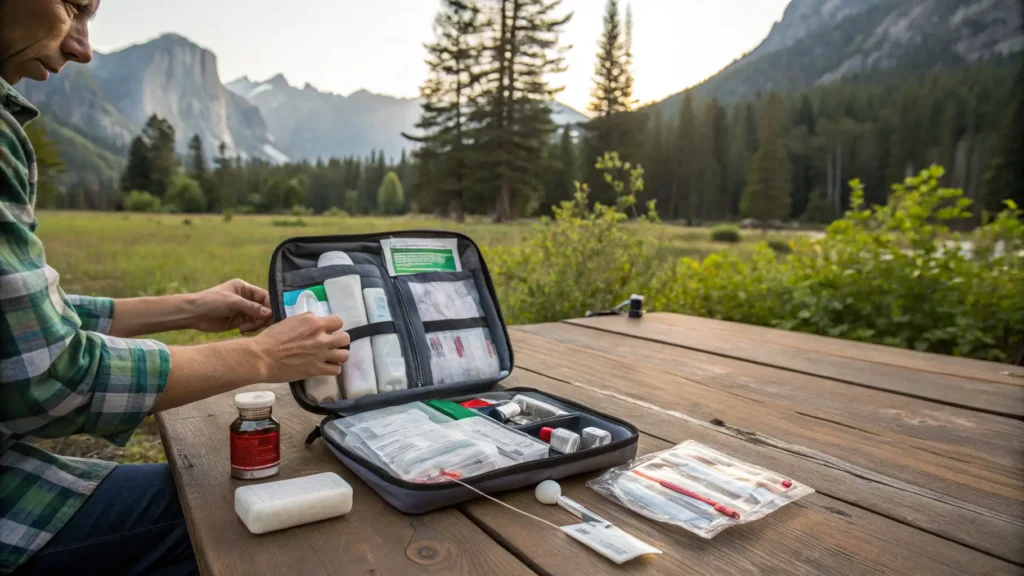
If you’ve ever grabbed a generic first aid kit off the shelf at a big-box store and tossed it into your pack, you’re not alone. But those pre-packaged kits are often loaded with items you’ll never use and missing critical supplies for real wilderness scenarios. Building your own DIY camping first aid kit means tailoring your supplies to your specific trip, terrain, group size, and personal health needs.
In this guide, you’ll discover seven essential tips for assembling a custom wilderness first aid kit that’s lightweight, comprehensive, and actually useful when it matters most. Whether you’re planning a weekend car camping trip or a multi-week backcountry adventure, these strategies will help you build smarter and pack better.
Tip 1: Start With a Clear Assessment of Your Trip and Group
Before you buy a single bandage, take a step back and honestly evaluate your situation. The best DIY camping first aid kit isn’t the most expensive one — it’s the most relevant one.
Ask Yourself These Key Questions
- How many people are in your group?
- How far from civilization will you be at your furthest point?
- How long will you be out there?
- Does anyone in your group have known medical conditions, allergies, or prescriptions?
- What activities are planned — hiking, climbing, kayaking, mountain biking?
- What’s the terrain and weather forecast?
A solo weekend hiker in a state park has wildly different needs than a group of six planning a ten-day backcountry traverse. Your trip profile directly shapes what goes into your kit. For example, kayakers need waterproof packaging as a non-negotiable, while climbers should prioritize wound care and blister management supplies.
Consider Existing Medical Needs
Talk to every member of your group before packing. If someone has a bee sting allergy, an epinephrine auto-injector like an EpiPen belongs in the kit — full stop. If anyone takes daily medications, carry extras. This personalized layer of planning is what separates a truly effective wilderness first aid kit from a generic collection of supplies.
Tip 2: Organize Your Kit Into Functional Categories
One of the most common mistakes people make when building a DIY camping first aid kit is dumping everything into one bag with zero organization. When someone is injured and adrenaline is pumping, you don’t want to dig through a jumbled mess to find a pair of tweezers.
Recommended Category System
- Wound Care: bandages, gauze, adhesive strips, antiseptic wipes, antibiotic ointment, medical tape
- Blister and Skin Care: moleskin, blister pads, hydrocolloid bandages, aloe vera gel
- Tools and Instruments: tweezers, trauma shears, safety pins, thermometer, irrigation syringe
- Medications: pain relievers, antihistamines, anti-diarrheal tablets, antacids, prescription meds
- Splinting and Mobility: SAM splints, elastic bandages, triangular bandages
- Emergency and Survival: CPR mask, emergency blanket, nitrile gloves, emergency whistle
- Documentation: first aid reference card, emergency contact list, medical information for group members
Use small ziplock bags, color-coded pouches, or labeled compartments within your kit container. When seconds count, clear organization can genuinely save a life.
Tip 3: Know the Wilderness First Aid Essentials — Don’t Skip These
Certain items are non-negotiable for any outdoor medical kit, regardless of trip length. These are the core supplies that address the most common and most dangerous wilderness injuries.
Wound Management Supplies
Cuts, lacerations, and abrasions are the most common backcountry injuries. Your wound care arsenal should include:
- Assorted adhesive bandages (multiple sizes)
- Sterile gauze pads (2×2 and 4×4 inch)
- Rolled gauze for larger wounds
- Medical-grade adhesive tape
- Antiseptic wipes or povidone-iodine solution
- Antibiotic ointment packets
- Closure strips or butterfly bandages for deep cuts
- A wound irrigation syringe — this is massively underrated and often overlooked
Proper wound irrigation with clean water removes debris and significantly reduces infection risk. Carry a small syringe and remember: pressure irrigation is more effective than simply pouring water over a wound.
Blister Care — More Serious Than You Think
Blisters might seem minor, but on a multi-day trip, an untreated blister can become infected, cause a limp, and derail an entire expedition. Pack moleskin, pre-cut blister pads, and hydrocolloid dressings. Learn the “donut” technique — cutting moleskin in a ring shape around the blister to relieve pressure without breaking the skin.
Essential Medications to Include
| Medication | Purpose | Notes |
|---|---|---|
| Ibuprofen or Acetaminophen | Pain relief, fever reduction, anti-inflammatory | Ibuprofen also reduces swelling from sprains |
| Diphenhydramine (Benadryl) | Allergic reactions, insect stings | Also works as a sleep aid in a pinch |
| Loperamide (Imodium) | Diarrhea management | Critical for preventing dehydration |
| Antacids | Heartburn, indigestion | Common issue around campfire cooking |
| Oral Rehydration Salts | Dehydration and electrolyte replacement | Lightweight and potentially life-saving |
| Hydrocortisone Cream | Insect bites, rashes, poison ivy | Relieves itching and minor skin inflammation |
| Epinephrine Auto-Injector | Severe allergic reactions (anaphylaxis) | Requires prescription; consult your doctor |
Tip 4: Go Lightweight and Compact — Every Ounce Matters
Backpackers know this lesson intimately: the heavier your pack, the more miserable your trip. Your DIY camping first aid kit needs to strike a balance between comprehensive coverage and manageable weight.
Smart Strategies for Reducing Weight
- Repackage medications into small ziplock bags instead of carrying full bottles
- Choose multi-use items where possible — a triangular bandage can serve as a sling, tourniquet, or splint padding
- Opt for individually packaged antiseptic wipes over a full bottle of antiseptic solution
- Use a lightweight dry bag or a dedicated ultralight first aid pouch rather than a bulky rigid case
- Trim redundancy — you probably don’t need twenty different bandage sizes; choose three core sizes and pack more of those
A well-built hiking first aid kit for one or two people should weigh under half a pound for weekend trips and under one pound for extended backcountry travel. Every item you pack should earn its spot by serving at least one clear, likely purpose for your specific trip.
Tip 5: Learn How to Use What You Pack
This is probably the most important tip in this entire guide, and it’s the one people skip most often. A SAM splint is useless if you don’t know how to apply it. An epinephrine auto-injector helps no one if the person holding it has never practiced using one.
Invest in Real Training
Consider taking a Wilderness First Aid (WFA) or Wilderness First Responder (WFR) course before your next major outdoor trip. These hands-on courses teach you how to assess injuries in remote settings, improvise medical care, and make evacuation decisions. Organizations like NOLS Wilderness Medicine, SOLO, and the Wilderness Medical Society offer certification programs across the country.
At a minimum, take a standard first aid and CPR certification course through the American Red Cross or American Heart Association. Even a few hours of training dramatically improves your ability to respond calmly and effectively during an emergency.
Practice Before You Go
- Practice wrapping an ankle sprain with an elastic bandage
- Rehearse applying a tourniquet correctly
- Know the signs of heat exhaustion versus heat stroke
- Understand how to recognize symptoms of altitude sickness
- Review your first aid reference card before the trip, not during an emergency
Tip 6: Customize for Your Environment and Season
Your outdoor medical kit should shift based on where you’re going and when. A summer desert trip demands completely different supplemental items than a winter mountaineering expedition.
Summer and Hot Climate Add-Ons
- After-sun lotion or aloe vera gel for sunburn
- Extra oral rehydration salts for heat-related illness prevention
- Insect repellent and after-bite itch relief
- Tick removal tool — a specialized tick key or fine-tipped tweezers
Winter and Cold Climate Add-Ons
- Chemical hand warmers that can serve double duty for mild frostbite first aid
- Extra emergency thermal blanket
- Lip balm with SPF protection
- Knowledge of frostbite and hypothermia recognition and treatment
High Altitude Add-Ons
- Acetazolamide (Diamox) — prescription medication for altitude sickness prevention; consult your physician
- A pulse oximeter to monitor blood oxygen levels
- Awareness of acute mountain sickness (AMS) symptoms: headache, nausea, dizziness, fatigue
Water and Aquatic Environment Add-Ons
- Waterproof dry bag for all kit contents
- Extra bandaging for skin maceration (prolonged moisture exposure)
- Ear drying solution to prevent swimmer’s ear
Tip 7: Maintain, Restock, and Review Your Kit Regularly
Building your DIY camping first aid kit once is only half the job. A first aid kit is only as good as its contents — expired medications, depleted supplies, and missing items can leave you dangerously under-prepared when the trail gets real.
Post-Trip Checklist
- Replace any supplies that were used, even partially
- Check expiration dates on all medications and replace as needed
- Inspect packaging for moisture damage, especially after wet trips
- Review what you used versus what you never touched — adjust accordingly for future trips
Annual Kit Review
Once a year, do a full inventory of your kit. Medications typically have one-to-three-year shelf lives. Adhesive bandages lose their stickiness over time. Antiseptic wipes dry out. Taking thirty minutes annually to go through your supplies could make a critical difference on your next adventure.
Store your kit in a cool, dry location away from direct sunlight when not in use. Heat and humidity degrade medications and supplies faster than you’d expect.
Key Takeaways
- A personalized DIY camping first aid kit is far more effective than any generic store-bought option because it reflects your specific trip, group, and health needs.
- Organize your supplies into clear categories so you can find items quickly under pressure.
- Prioritize wound care, blister management, medications, and emergency tools as your non-negotiable core supplies.
- Keep weight manageable by repackaging, choosing multi-use items, and cutting redundancy.
- Training is as important as equipment — know how to use everything in your kit.
- Customize your kit for your specific environment, season, and altitude.
- Maintain your kit consistently — check expiration dates, restock after each trip, and do an annual full review.
Frequently Asked Questions
What should be in a DIY camping first aid kit for beginners?
A beginner’s DIY camping first aid kit should include assorted adhesive bandages, sterile gauze pads, medical tape, antiseptic wipes, antibiotic ointment, moleskin for blisters, tweezers, nitrile gloves, ibuprofen, antihistamines, oral rehydration salts, and an emergency blanket. Start with these fundamentals and build from there as your camping experience grows.
How do I keep my camping first aid kit lightweight for backpacking?
Repackage medications into small labeled ziplock bags, choose compact multi-use items like triangular bandages, use individual wipe packets instead of bottles, and trim redundant supplies. A well-optimized first aid kit for one or two backpackers can weigh under half a pound without sacrificing essential coverage.
How often should I replace items in my outdoor first aid kit?
Restock any used supplies immediately after each trip. Check expiration dates annually for all medications and replace as needed. Inspect adhesive products and antiseptic wipes every year, as they can dry out or lose effectiveness over time. Most medications are effective for one to three years if stored properly in cool, dry conditions.
Do I need a prescription for any items in a camping first aid kit?
Most essential first aid supplies are available over the counter. However, an epinephrine auto-injector (EpiPen) for severe allergic reactions and acetazolamide (Diamox) for altitude sickness prevention both require a prescription. If anyone in your group has known severe allergies or plans to visit high altitude destinations, speak with a physician before your trip.
What’s the difference between a wilderness first aid kit and a regular first aid kit?
A wilderness first aid kit is designed for remote settings where evacuation to medical care may take hours or days. It typically includes more advanced wound care supplies like irrigation syringes and SAM splints, medications for a wider range of conditions, and tools for extended injury management. A regular first aid kit assumes access to emergency services within minutes.
How do I build a family camping first aid kit for kids?
Add pediatric-appropriate items to your family camping first aid kit, including children’s dosages of pain relievers and antihistamines, smaller bandage sizes, calamine lotion for rashes and bug bites, and a digital thermometer. Also carry any prescription medications your children need. Adjust medication dosages based on each child’s weight and consult your pediatrician before the trip.
What container works best for a DIY camping first aid kit?
The best container depends on your trip type. For backpacking, a lightweight roll-top dry bag or a dedicated ultralight first aid pouch works well. For car camping, a structured waterproof case with compartments provides better organization. Whatever you choose, make sure it’s waterproof or water-resistant, clearly identifiable, and easy to open with one hand if necessary.
Should every person in a camping group carry their own first aid kit?
For day hikes and short trips, one shared kit is typically sufficient. For multi-day backcountry trips, it’s wise for every individual to carry personal medications and a small personal blister and wound care kit, while a larger shared kit handles more serious supplies. This approach distributes weight and ensures critical personal medications are always accessible to the person who needs them.
Conclusion
Building a thoughtful, well-organized DIY camping first aid kit is one of the most impactful things you can do to protect yourself and the people you adventure with. It’s not about packing every possible item — it’s about packing the right items for your trip, knowing how to use them, and keeping everything in good condition.
The seven tips in this guide give you a clear, actionable framework: assess your trip and group first, organize by category, cover your non-negotiable essentials, keep weight in check, invest in proper training, customize for your environment, and maintain your kit year-round. Follow these principles and you’ll head into the wilderness with genuine confidence, not just the illusion of it.
The outdoors is one of the greatest gifts available to you — and being prepared means you can focus on the breathtaking views, the campfire stories, and the memories you’re building, rather than wondering what you’d do if something went wrong.
Ready to Build Your Kit?
Start today — seriously, right now. Pull out a notepad, run through your next camping trip details, and begin your personalized supply list using the tips and table above as your guide. Share this article with your hiking partners, campmates, or adventure crew so everyone shows up prepared.