How to Put Up a Tent Alone: Simple Instructions for a Stress‑Free Solo Setup
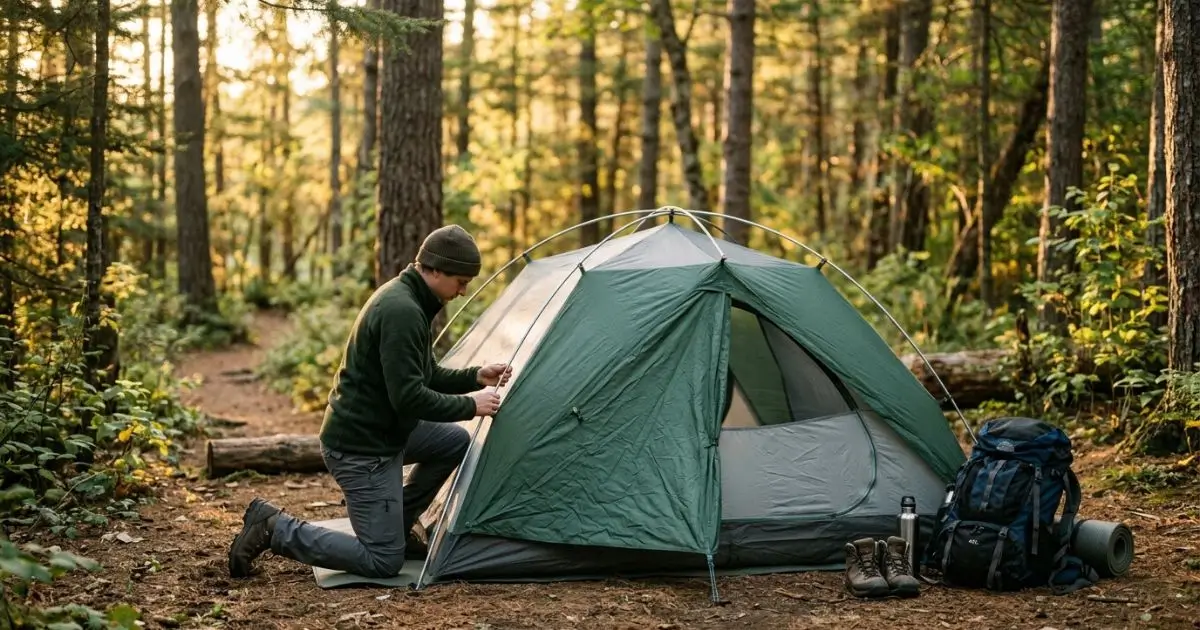
Arriving at camp on your own can feel empowering—right up until you’re standing there with a bundle of fabric, a handful of poles, and the daylight slipping away. If you’ve ever felt that flash of panic (“Why is this not standing up?”), you’re not alone.
The good news: once you learn a reliable order of operations, how to put up a tent alone becomes a straightforward routine. You’ll spend less time wrestling your gear and more time doing what you came for—settling in, eating something warm, and sleeping comfortably.
Table of Contents
What You Need to Put Up a Tent Alone (Solo Setup Checklist)
Before you start, get your gear organized. Solo pitching is easier when you don’t have to dig through bags mid-setup.
Essentials you should have ready
- Tent body (inner tent)
- Rainfly
- Poles
- Stakes
- Guy lines (ideally already attached to the fly)
- Footprint/groundsheet (recommended to protect the floor)
Helpful extras that make solo setup smoother
- Headlamp (you’ll want both hands free)
- Small mallet or a sturdy rock (for stakes in hard ground)
- Work gloves (useful in cold or rocky sites)
- Spare stake + short cord (fast fix for breakage)
- Small towel (wipes moisture and dirt before packing)
Source notes to reference (for credibility):
- Your tent’s manufacturer manual (always the most accurate for pole routing)
- REI-style educational guides on tent pitching basics (general best practices)
Choose the Best Spot (Your Setup Gets Easier Immediately)
A great campsite “does the work for you.” A bad one turns a simple pitch into an exhausting fight.
Quick rules for choosing a solo-friendly tent site
- Aim for flat ground (gentle slope is okay; avoid obvious dips)
- Avoid low spots where rainwater will pool
- Check overhead hazards like dead branches (“widowmakers”)
- Look at wind direction and tuck behind a natural windbreak (not directly under a tree canopy in stormy weather)
- Stay off animal paths and away from ant hills
30-second ground scan (worth doing every time)
- Kick away sharp rocks and sticks
- Check for pinecones, thorns, and anything that could puncture the floor
- Make sure you have room for guy lines (often wider than your tent footprint)
Source notes to include:
- Leave No Trace guidance (durable surfaces, minimizing impact)
- National park/outdoor safety guidance on hazards and runoff
Identify Your Tent Type First (So You Use the Right Method)
Not every tent is pitched the same way. Knowing what you’re working with prevents a lot of “Why won’t this stand up?” frustration.
Freestanding vs. non-freestanding tents
- Freestanding tents: the pole structure gives the tent its shape. You should still stake it, but it can stand before staking.
- Non-freestanding tents: the tent needs stakes (and sometimes trekking poles) to hold its shape. Staking is not optional.
Fast test
- If the tent stands up once the poles are in, it’s freestanding (or semi-freestanding).
- If it stays floppy until you stake corners, you’re working with a non-freestanding design.
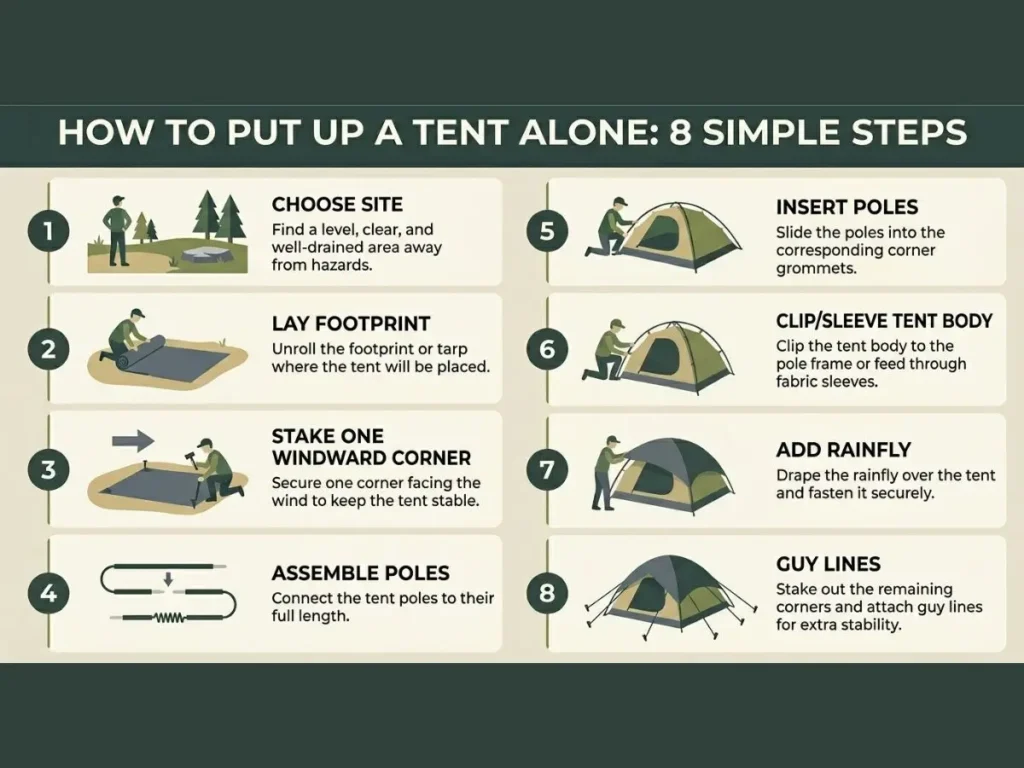
Step-by-Step: How to Put Up a Tent Alone (Simple Instructions)
This sequence works for most modern backpacking and camping tents. Your manual may tweak details, but the overall flow stays consistent.
Step 1: Lay down your footprint (optional, but smart)
A footprint protects the floor from abrasion and makes cleanup easier.
- Align it with the door direction you want
- Tuck footprint edges under the tent area (so rain doesn’t collect between layers)
Step 2: Anchor one corner first (the solo “anti-kite” trick)
If there’s wind—even a little—your tent body can turn into a parachute.
- Choose the corner facing into the wind (windward side)
- Stake that corner down first
- Keep the rest of the tent bundled until you’re ready to spread it out
This is one of the simplest ways to make how to put up a tent alone feel controlled instead of chaotic.
Step 3: Unroll and orient the tent body
- Find the door and face it where you want (toward views, away from wind)
- Lay the tent body over the footprint
- Make sure the floor isn’t twisted (corners should match the shape of the footprint)
Step 4: Assemble the poles completely
- Snap each pole segment together until fully seated
- Don’t force bent sections; check for misaligned joints first
Your quick pole mistake check
If a pole seems “too short,” it’s often because:
- a segment isn’t fully seated, or
- you grabbed the wrong pole (some tents have similar-looking poles)
Step 5: Insert poles and connect the tent body
This depends on your tent style:
- Clip system: faster, easier solo
- Insert pole ends into grommets or cups
- Clip the tent body starting near the middle, then work outward
- Sleeve system: more stable in wind, but slower
- Feed poles carefully to avoid snagging
- Don’t yank—walk the pole through
Solo control tip (especially in wind)
Keep one knee or your hand pressing the anchored corner while you bend and seat the poles. That small anchor point keeps everything from sliding.
Step 6: Stake the remaining corners (square it up)
Now that the structure is up, dial in the shape.
- Pull the opposite corner until the floor is smooth (not overstretched)
- Stake corners so the base is symmetrical
- Tighten gradually—don’t crank one side fully tight while the other is loose
Step 7: Add the rainfly
- Match fly doors/vestibules with the tent door
- Attach buckles or hooks loosely first
- Tighten evenly afterward so the fly sits centered
Step 8: Guy out the tent for real stability
If weather changes overnight, guylines are what keep things comfortable.
- Start with windward guylines
- Stake at about a 45-degree angle away from the tent
- Tension until firm, not guitar-string tight (over-tensioning can stress fabric and seams)
Source notes to include here:
- Manufacturer manual for pole routing and fly attachment
- General outdoor guidance on staking angles and wind stability
- NOAA/local forecast for planning around wind and rain
Solo Tent Setup Table (Fast Reference)
Use this as your “do it in order” checklist when your brain is tired.
| Step | What to Do | Typical Time | Common Solo Mistake | Quick Fix |
| 1 | Pick a flat, safe site | 2–5 min | Setting up in a low spot | Move to slightly higher ground |
| 2 | Anchor one corner | 1 min | Tent blows around | Stake windward corner first |
| 3 | Assemble poles | 2–4 min | Segments not fully seated | Re-seat every joint |
| 4 | Insert poles + attach body | 3–6 min | Twisted routing | Check color coding/manual |
| 5 | Stake remaining corners | 2–4 min | Over-tensioning one side | Re-square and re-stake |
| 6 | Attach rainfly | 2–5 min | Fly misaligned to doors | Rotate before tightening |
| 7 | Guy out for wind/rain | 2–5 min | Skipping guylines | Guy out windward side first |
How to Put Up a Tent Alone in Wind, Rain, or Darkness
Conditions change the order of priorities. Here’s how to adapt without overthinking it.
If it’s windy
- Anchor a corner immediately, then keep fabric low
- Add poles while the tent is controlled and partially staked
- Use extra guylines and stake the fly well
- Camp behind natural windbreaks (safely)
If it’s raining
- Work fast, but don’t rush errors (mistakes waste more time)
- Get the structure up and fly on early
- Keep the inner tent as protected as possible (some designs allow fly-first pitching—check your manual)
- Ventilate once set to reduce condensation
If it’s dark
- Put on a headlamp before you start
- Keep stakes in one pocket, a few at a time
- Use a small groundsheet or stuff sack to prevent lost parts
- If you can, practice at home once—night setup becomes dramatically easier
Common Problems When Pitching a Tent Alone (And Easy Fixes)
“My tent won’t stand up”
- You may have a non-freestanding tent that requires staking first
- Or the poles aren’t fully seated into the grommets/cups
Fix: re-check corners, then reseat pole ends and tighten gradually.
“The poles don’t fit / feel the wrong length”
- A segment might not be snapped together
- You may have swapped poles (common with similar sets)
Fix: align by color-coding or labels; fully seat joints.
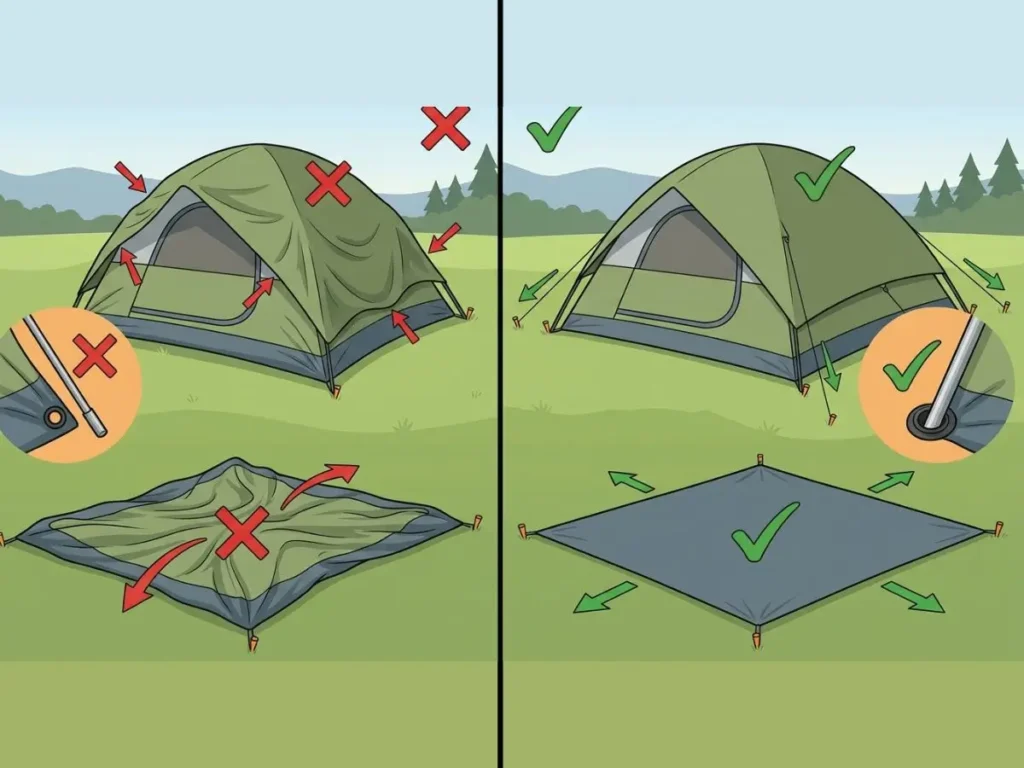
“The rainfly is sagging or touching the inner tent”
That can cause drips from condensation transfer.
Fix:
- Center the fly
- Tighten evenly
- Add guylines to pull the fly away and improve airflow
“Stakes won’t go in”
Hard ground happens.
Fix options:
- Angle stakes at 45 degrees
- Try a different spot a few inches away
- Use rocks as anchors (or tie off to a heavy object)
- In sand/snow, use a “deadman” anchor method (bury a stick/bag and tie off)
Pro Tips to Put Up a Tent Alone Faster Every Time
Practice once before your trip
Even 15 minutes in a yard or living room helps you:
- recognize pole layout quickly
- understand how the fly aligns
- pack it back in the right order
Pack smart for solo pitching
- Keep stakes accessible (outer pocket or top of pack)
- Store rainfly where you can grab it fast in sudden rain
- Pre-attach guylines so you’re not tying knots in the wind
Create a tiny “pitch kit”
In one bag, keep:
- stakes
- guyline tensioners
- headlamp
- small repair items (duct tape strip, spare cord)
Conclusion: You’ve Got This (Even When You’re Solo)
Once you follow a simple sequence—site selection, one-corner anchor, poles, stake, fly, guylines—you’ll stop feeling like you’re “figuring it out” every time. You’ll just be pitching your shelter, calmly, even if the weather is moody or you’re arriving late.
If you want to get confident fast, set your tent up once at home and time yourself. On your next trip, you’ll notice the difference immediately.
FAQ: How to Put Up a Tent Alone (Quick Answers)
How to put up a tent alone if it’s really windy?
Stake the windward corner first, keep fabric low, and use guylines early. Wind turns loose nylon into a sail, so anchoring before you build the pole structure makes everything easier.
How to put up a tent alone without stakes?
If your tent is freestanding, you can assemble poles and stand it up, then weigh corners with rocks or heavy gear. If it’s non-freestanding, you’ll need alternative anchors (rocks, logs, or deadman anchors in sand/snow).
How to put up a tent alone in the rain without soaking the inside?
Move quickly through the basics: footprint down, anchor corner, poles in, then rainfly on as soon as the tent has shape. Once covered, finish staking and guylines under the fly’s protection.
How long does it take to put up a tent alone?
Most people land in the 10–20 minute range, depending on tent size, wind, and experience. Your first attempt might take longer—after one practice run, you’ll get much faster.
How to put up a tent alone for the first time?
Follow the manual once, use the one-corner anchor method, and don’t fully tighten stakes or fly straps until the tent is squared up. If you get stuck, stop and check for twisted corners or unseated pole segments—those are the usual culprits.