
How to Set Up a Tent Step by Step: A Beginner’s Guide to a Dry, Stable, Stress-Free Camp
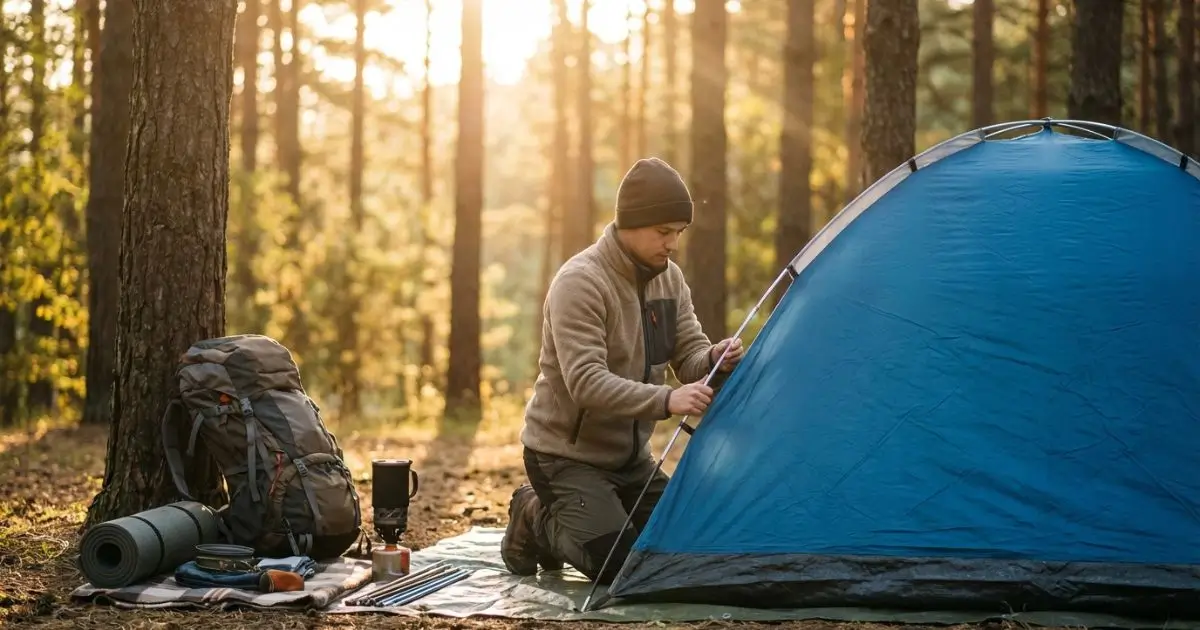
The first time you camp, the tent can feel like a pop quiz you didn’t study for. You arrive excited, you unzip the bag, and suddenly you’re holding a tangle of poles and fabric while the sun slides down faster than you expected. If you’ve ever felt that rising “I hope I didn’t mess this up” panic—good news: you’re not alone, and you’re not doing anything wrong.
You just need a clear order of operations. Once you learn how to set up a tent step by step, you’ll stop guessing, stop rushing, and start enjoying that moment when your shelter clicks into shape and the campsite finally feels like yours.
Table of Contents
What You’ll Need Before You Start (Beginner Tent Setup Checklist)
Before you pitch a tent, take two minutes to lay out your gear. It prevents the classic “where are the stakes?” frustration.
Essential items
- Tent body (the main fabric part)
- Rainfly (the waterproof outer layer, sometimes attached)
- Poles (usually connected with shock cord)
- Stakes/pegs (often 6–12 depending on tent style)
- Guylines (thin cords for wind stability)
- Footprint/groundsheet (optional, but highly recommended)
- Mallet (or a rock if the ground is hard)
- Headlamp (because setup always takes longer at dusk)
Helpful extras (not required, but nice)
- Small towel/cloth (for wiping condensation)
- Spare cord (for repairs or extra guying out)
- A small bag to keep stakes together
Why the footprint matters: Many outdoor retailers and tent manufacturers recommend a footprint to reduce abrasion and help keep moisture from seeping through the floor over time. If you don’t have one, a basic tarp can work—just keep it tucked under the tent (more on that soon).
Choose the Best Campsite (Site Selection Tips for Tent Setup)
A perfect tent pitch won’t save you from a bad spot. Site choice is half the battle.
Pick ground that won’t punish you at 2 a.m.
- Aim for flat or gently level ground. Slightly elevated is better than low.
- Avoid dips, channels, or dry creek beds—they can collect water in rain.
- Scan overhead for dead branches (often called “widowmakers”).
- Check for rocks and roots before you commit.
Think about wind, door direction, and convenience
- If it’s breezy, position your tent so the door isn’t facing straight into the wind.
- Keep a reasonable distance from:
- Fire rings/grills (sparks happen)
- Bathrooms/trails (noise and foot traffic)
- Water sources (many areas require camping away from streams/lakes)
Follow Leave No Trace basics
If you’re in an established campground, use the designated pad. If you’re dispersed camping, choose durable surfaces and avoid crushing fragile plants. Leave No Trace guidance is a solid reference point for campsite decision-making.
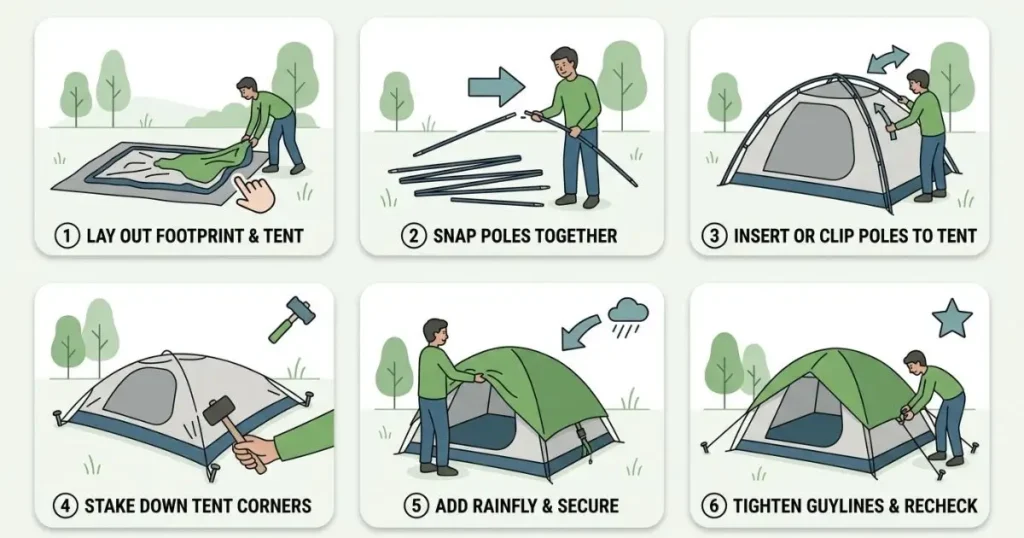
How to Set Up a Tent Step by Step (Beginner Walkthrough)
Every model is a little different, but the flow is almost always the same. Use this sequence and you’ll feel in control.
Step 1: Unpack and identify the parts
Lay everything out where it won’t blow away. You’re looking for:
- Tent body
- Rainfly
- Poles (count sections, check tips)
- Stakes and guylines
Tip: Fully seat the pole segments. A pole that looks connected but isn’t fully inserted is more likely to bend under tension.
Step 2: Lay down the footprint (optional, but smart)
Spread your footprint or tarp where the tent will sit.
Important: Tuck the footprint edges under the tent shape. If it sticks out, it can catch rain and funnel water under your floor.
Step 3: Position the tent body
Place the tent body on top of the footprint and decide your orientation:
- Door facing away from wind (when possible)
- Door facing a view, if you’ve got one
- Enough space to open the door without brushing bushes or rocks
Smooth the floor so the corners are easy to find.
Step 4: Assemble the poles
Let the shock cord do the work—don’t snap the segments aggressively.
- Connect pole sections
- Sort poles by length (some tents have two long poles + a short brow pole)
Step 5: Attach poles to the tent body
This depends on tent style:
- Clip system: Clip tent fabric onto poles (fast and common).
- Sleeve system: Slide poles through fabric sleeves (often sturdier in wind, slightly slower).
Then seat the pole tips into the grommets/pins at the tent corners. Your tent should start to stand up on its own.
Step 6: Stake the corners (light tension first)
Stake down the tent corners so the base stays square.
Best practice:
- Start with two opposite corners
- Then stake the remaining corners
- Keep tension light until everything is aligned
Stake angle tip: Push stakes in at about a 45-degree angle away from the tent for better holding power.
Step 7: Add the rainfly
Drape the rainfly over the tent and align it correctly:
- Doors should match doors
- Vents should sit where they’re designed to vent
- Buckles/straps should reach the correct corners
Attach the fly to the tent corners and secure any Velcro wraps around poles if your tent has them.
Step 8: Guy out the tent (especially for wind and rain)
Guylines reduce flapping, add stability, and can help keep the fly off the inner tent.
- Stake guylines so they pull away from the tent at an angle
- Tighten until taut, not guitar-string tight
A quick knot option (if you don’t have tensioners)
If your guylines don’t have built-in adjusters, learn a simple taut-line hitch. It slides to tighten, then holds under tension.
Step 9: Final tension check and a quick interior setup
Walk around your tent:
- Re-tighten corners and guylines after a few minutes (fabric relaxes)
- Make sure the rainfly isn’t sagging into the inner tent
Inside, keep bags and sleeping gear away from the walls to reduce dampness from contact.
Tent Setup Table (Quick Reference)
| Step | What you do | What to watch for | Quick win |
| 1 | Lay out all parts | Missing stakes/poles | Count pieces before you start |
| 2 | Place footprint | Footprint sticking out | Tuck edges under the tent |
| 3 | Orient tent body | Door facing wind | Turn door away from gusts |
| 4 | Assemble poles | Segments not seated | Push segments fully together |
| 5 | Attach poles | Twisted fabric | Keep corners aligned |
| 6 | Stake corners | Over-tightening early | Stake loosely, adjust later |
| 7 | Add rainfly | Misaligned doors/vents | Match fly door to tent door |
| 8 | Guy out lines | Skipping in bad weather | Use guylines for stability |
| 9 | Re-tension | Sagging fly | Tighten after 5–10 minutes |
Common Beginner Mistakes (And Easy Fixes)
“My tent floor is wet”
Possible causes:
- Footprint/tarp edges sticking out
- Camping in a low spot where water collects
- Condensation (not leaks)
Fixes:
- Tuck the footprint under the tent
- Move to slightly higher ground if possible
- Ventilate (crack vents, open a top panel if weather allows)
“My stakes won’t go in” or “they keep pulling out”
Hard ground:
- Use a mallet or flat rock
- Try moving the stake a few inches—sometimes you’re hitting a buried rock
Soft or sandy ground:
- Use longer stakes if you have them
- Angle stakes more aggressively
- Use nearby rocks to reinforce anchor points
“The rainfly keeps sagging”
- Re-center the fly so straps reach evenly
- Tighten guylines and corner straps
- Expect to re-tighten after the fabric relaxes (especially in cool night air)
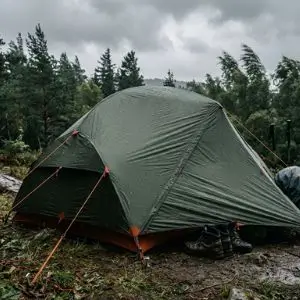
How to Set Up a Tent in Wind or Rain (Weather Tips for Beginners)
Windy setup tips
- Keep the tent body weighted (stuff sack, backpack, or a few rocks) until poles are attached.
- Stake the windward side first.
- Use guylines early—don’t wait for the first big gust.
Rainy setup tips
- Work quickly but calmly. Rushing leads to mistakes that soak your inner tent.
- If your tent allows it, consider pitching the rainfly first, then attaching the inner (some designs support this—check your manual).
- Keep mesh panels and the interior exposed for as little time as possible.
After Setup: Comfort, Safety, and Tent Care
Small changes that make your night better
- Put a small tarp, mat, or even a bandana at the door to reduce tracked-in dirt.
- Store your headlamp in the same pocket every time so you can find it in the dark.
- Keep vents open as much as weather allows for airflow.
Basic safety rules you shouldn’t skip
- Don’t cook inside the tent (fire risk + carbon monoxide risk).
- In areas with wildlife, follow local food storage rules (bear boxes, canisters, or proper hangs).
Packing up: keep your tent from getting funky
- Shake out debris
- Wipe moisture when you can
- Air-dry at home if you packed it damp (this helps prevent mildew and odor)
FAQ: How to Set Up a Tent Step by Step (Beginner Questions)
How to set up a tent step by step if you’ve never done it before?
You’ll do fine if you stick to the order: site → footprint → tent body → poles → stake corners → rainfly → guylines → final tension check. Practice once at home so the campsite isn’t your first attempt.
How to set up a tent step by step in the dark?
Use a headlamp, keep stakes in a single pile, and assemble poles first. If you can, pre-attach guylines at home so you’re not threading cords at night.
How to set up a tent step by step in strong wind?
Stake the windward corners first, keep fabric weighted until poles are seated, and use guylines immediately. Wind is manageable when the base is anchored early.
How to set up a tent step by step to reduce condensation?
Ventilation is your friend. Use rainfly vents, avoid pitching in damp low spots, and keep sleeping bags away from the walls so moisture doesn’t transfer.
How long does it take to set up a tent step by step?
As a beginner, plan on 10–30 minutes depending on tent size, pole system, and conditions. After a couple of trips (or one backyard practice), you’ll usually cut that time down a lot.
Conclusion: You’re Closer to “Easy Camping” Than You Think
Once you know how to set up a tent step by step, camping stops feeling like a gear struggle and starts feeling like a routine you can rely on. Pick a smart site, build your structure in the right order, and use the rainfly and guylines the way they’re meant to work. That’s how you stay drier, warmer, and calmer—no matter what the forecast does.